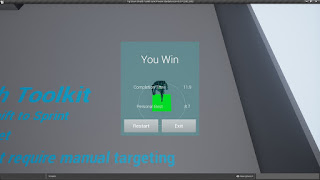
I've been thinking about adding some new features to the End Game HUD apart from the default 'Restart' & 'Exit' options. So it seemed like a sensible option to include time stats for the mission. It could also serve as a lightweight tutorial of sorts for how to implement basic save game functionality, as the high score would have to be retrieved & edited across multiple instances of the game. So basically, new data gets displayed & saved based on comparison between the values of new completion time for the level as well as any existing high scores. Here's a preview screenshot for the same:
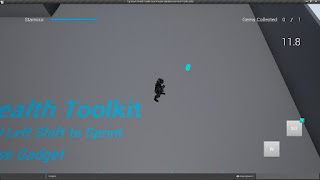
The time stats are automatically hidden if the player fails to complete the level, thus leaving only the restart & exit options. Apart from that, the main Top Down HUD also displays the mission timer so that players can keep track of the current status of the game.
That's all for this post. I'm planning to add a few more features over the next couple of days before submitting the update to the marketplace. Nothing major, just a few small feature requests that I've received. I don't want this update to make too many changes to the vanilla 4.11 version as the files are essentially getting replaced unlike the previous update where the updated files were made exclusively through 4.11 version without impacting the 4.10 project files.
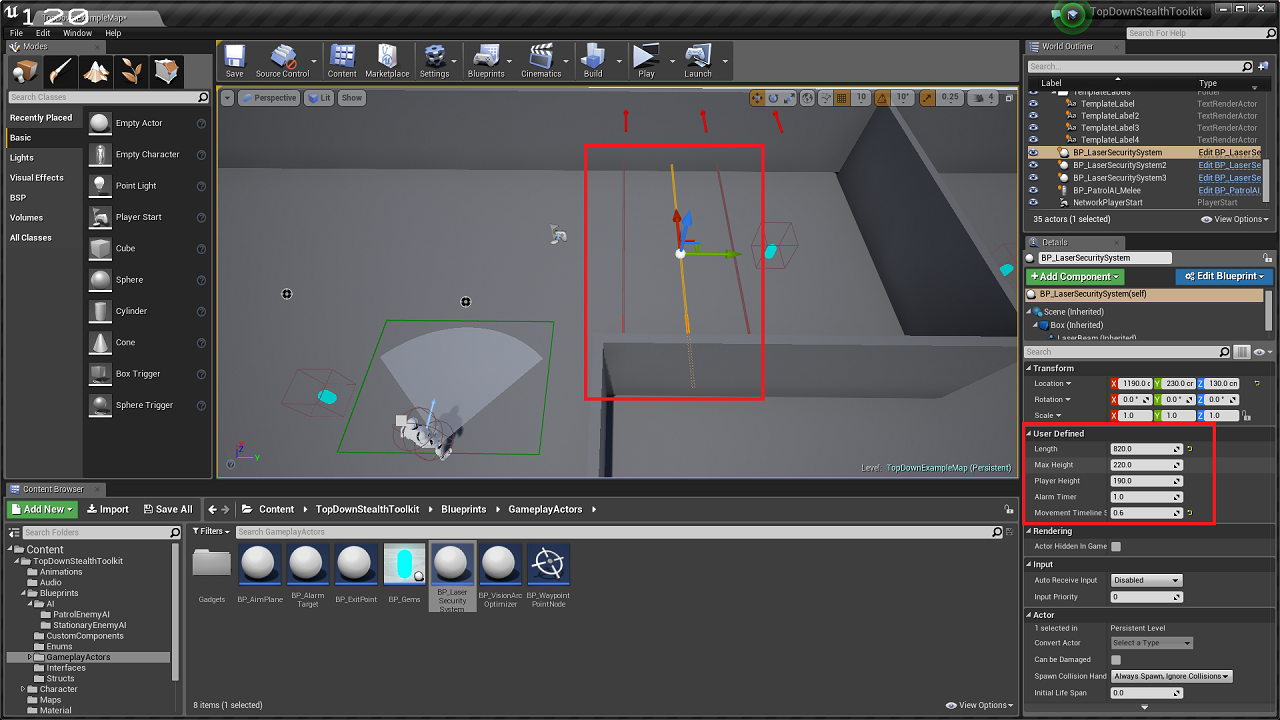
The v1.2 update for Top Down Stealth Toolkit will feature a new Laser Security system that can alert nearby patrol bots upon being intercepted by the player character. The user can specify the length, max height, starting laser position, etc directly through publicly exposed variables [screenshot below; variables names subject to change] to easily change the properties of individual actors in the scene. The max height of the player character can also be set to change the color of the laser accordingly, thus providing the player with the tools to time their decisions.
Since the camera & turret AI already showcase how to use direct math calculation & interp to enable both passive surveillance as well as active lock on systems, I decided to use timelines here to drive the laser movement. It's an easy setup, that uses the same Alarm Target actors that are used by camera bots to trigger alarms.
Here's a preview video of the Laser Security systems in action:
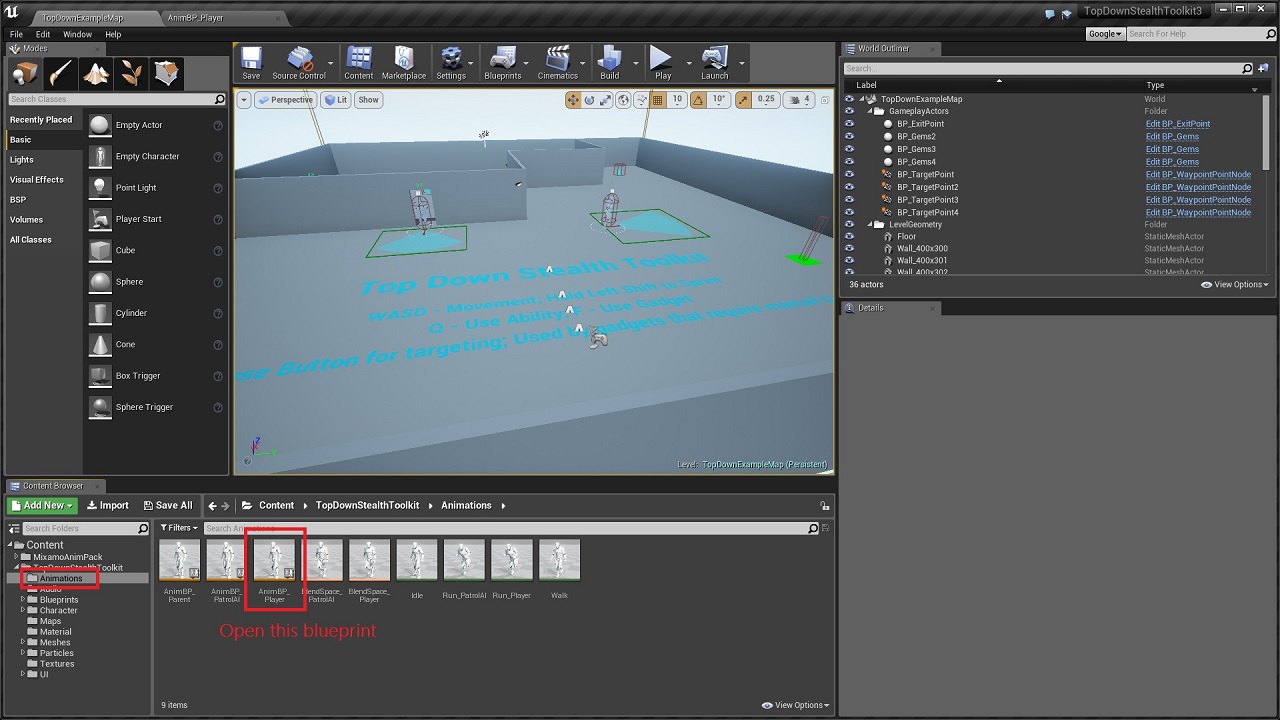
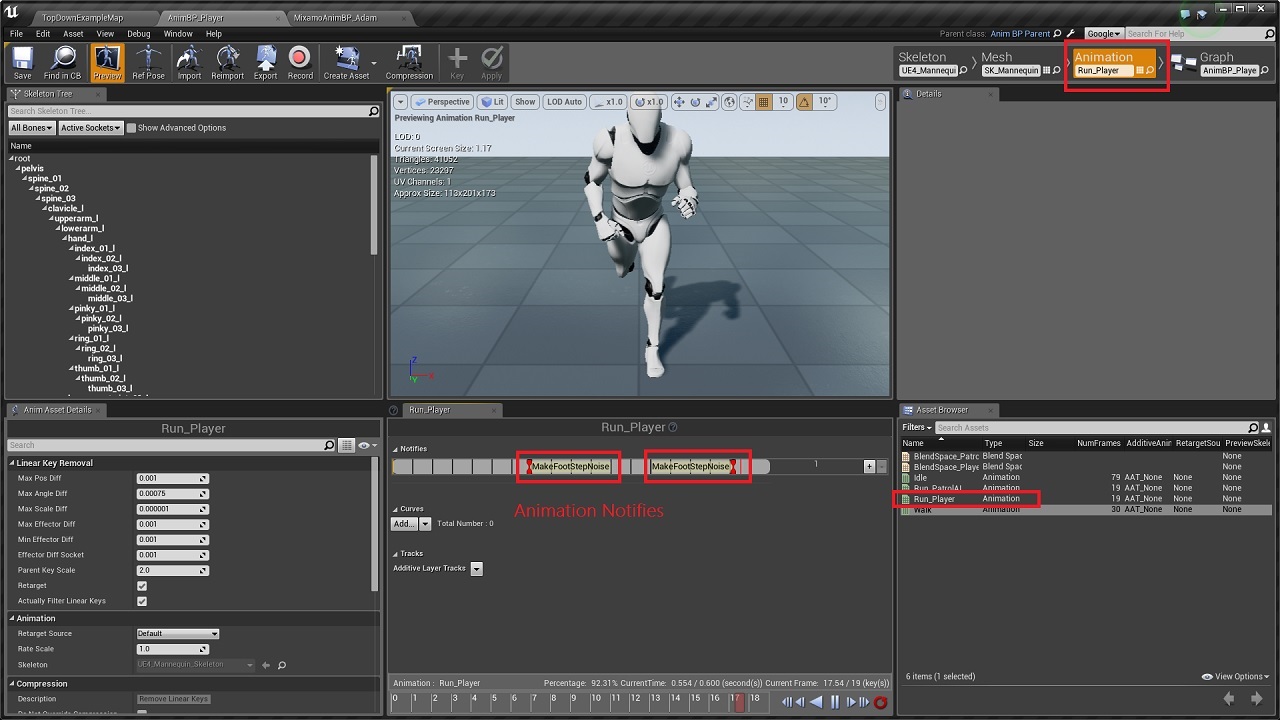
Q: I replaced the default skeletal mesh of the player character with a mixamo character mesh. And now I cannot see the footstep rings when the character is running. How do I fix this? A: Since you're using a mixamo character, I think it's using the mixamo animation blueprint instead of the animation blueprint used the by the default character. The footstep rings are called from the animation blueprint, so you'll have to copy that code to the mixamo character's animation blueprint. You can follow the step detailed below to get the footstep rings working: 1. Open the 'AnimBP_Player' under the animations folder.
2. Under the Animation tab, double click on the 'Run_Player' animation. You will notice that there are two red markers along the animation track. These are notify events that get triggered everytime the animation reaches the point where a feet touches the ground. So we have one each for left & right foot for a single cycle of the run animation.
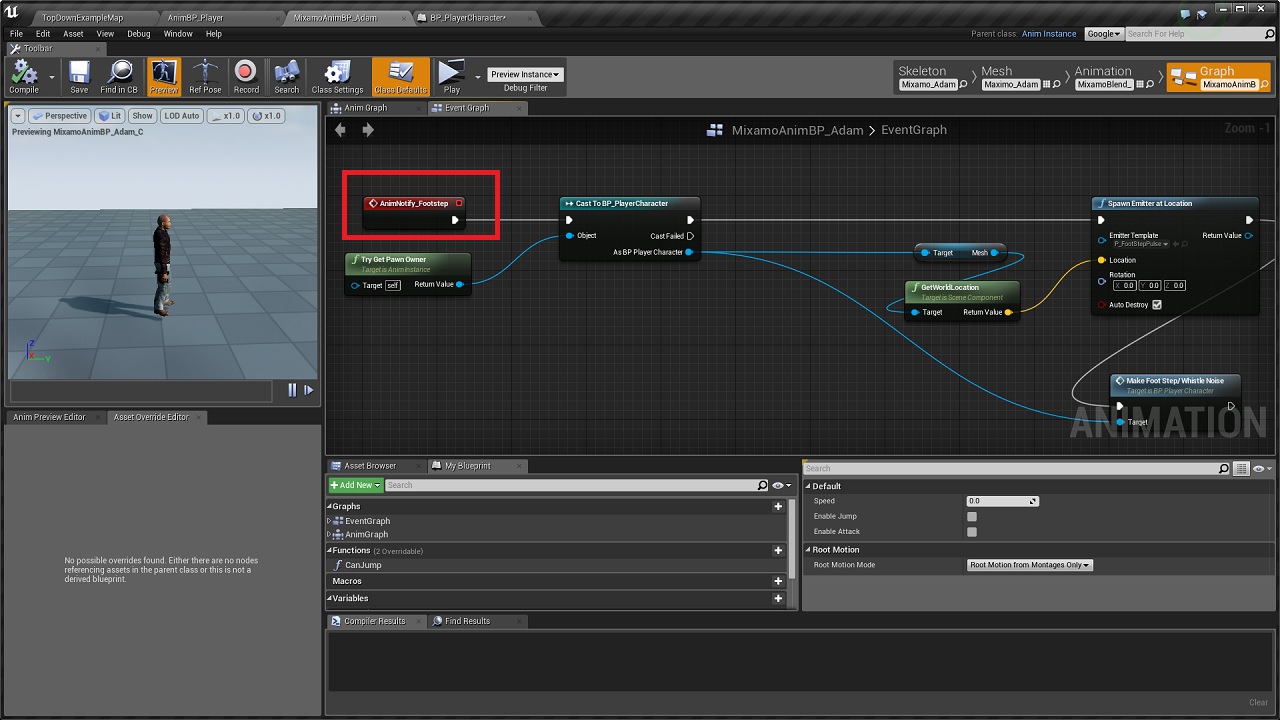
3. Now if you go to the Anim Graph for the same blueprint, you will notice that I've added the anim notify event for footstep noise. This event gets triggered from the anim notifies we placed along the run animation. So using this event, we spawn the ring particle for footstep & then call the 'Make Footstep/Whistle Noise' from player character blueprint.
Now we'll implement the same in Adam's animation blueprint.
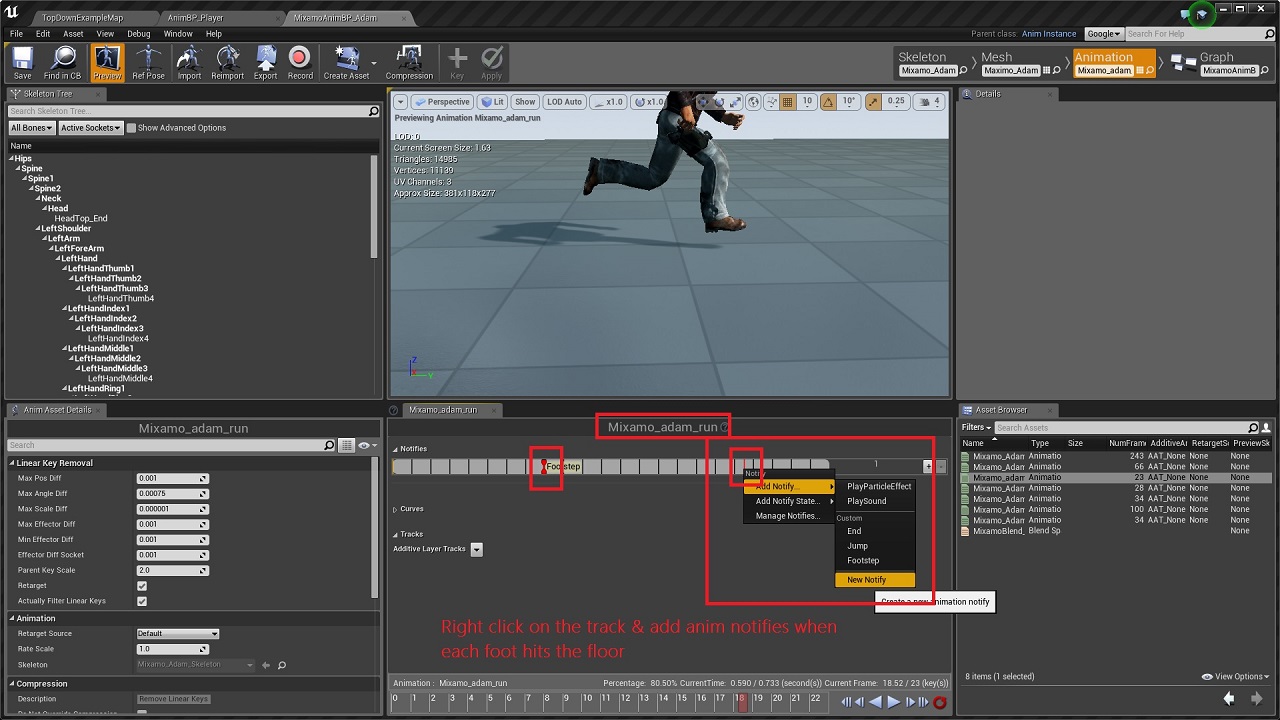
4. So within the Animation Tab of Adam Animation BP, double click on the run animation. Now right click on the track & add a new anim notify when the first foot hits the ground. Then add the same notify again later down the track when the other foot hits the ground. With that, we have the anim notifies set up everytime the feet hits the floor.
5. Now we need to go to the Anim Graph of the same blueprint & call the notify event. Right click anywhere on the graph & type in the name of the notify that you had given in the previous step. I gave the name 'FootStep' for the notifies, so m event will be named automatically as 'AnimNotify_Footstep'. Add the event in the graph & copy the particle spawn & foot step noise code into this.
6. Now within the Animation tab for Adam, if you check out the blend space, you will notice that the speed ranges from 0 to 400.
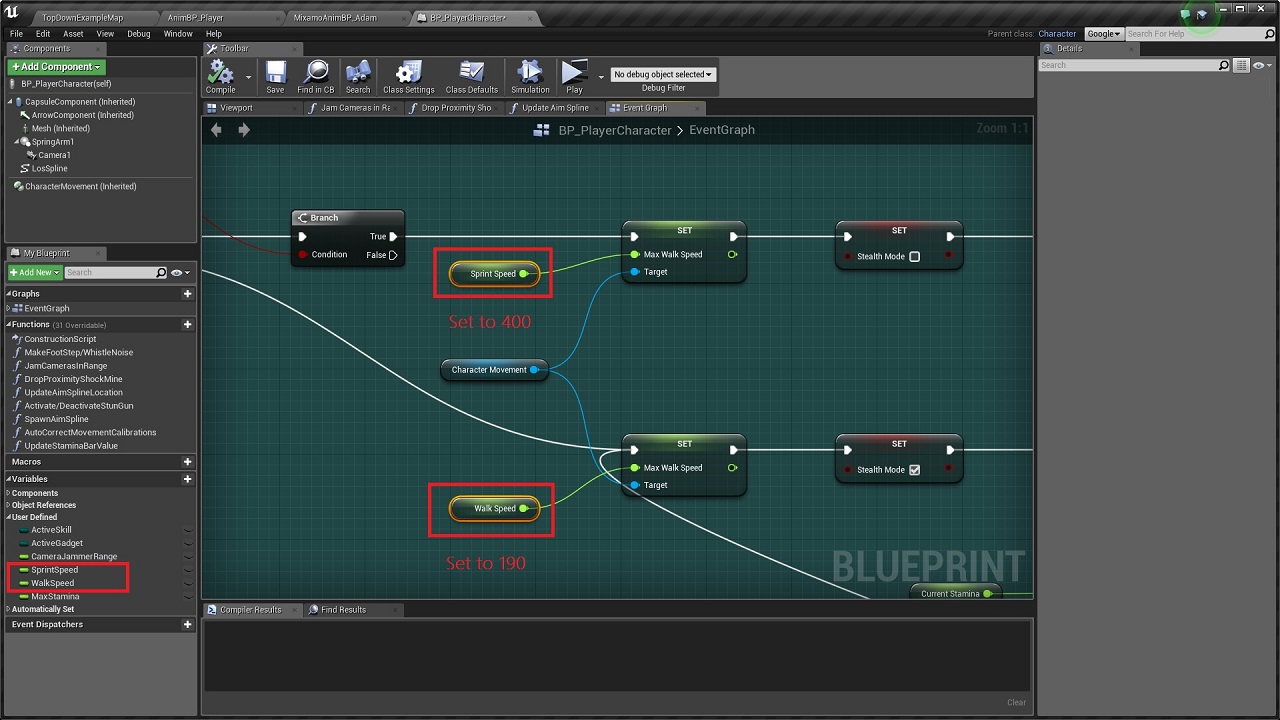
So now we just need to set the walk and sprint speed for our player character in the 0 to 400 range. So go to 'BP_PlayerCharacter' & set the 'WalkSpeed' variable to 190 & 'SprintSpeed' variable to 400.
Apart from the Artillery Tower mentioned in an earlier post [Link: http://unrealpossibilities.blogspot.in/2016/05/tower-defense-starter-kit-v12-update.html], the other new feature that will be available in the v1.2 update for Tower Defense Starter Kit is a Level Selection Menu. With this new system, the player can choose from any of the unlocked levels in the project when starting a game. As the player progresses through the campaign, more levels will get unlocked automatically which then gets reflected in the menu & remains persistent throughout subsequent instances of the game. The player can also choose between the default campaign mode or the endless mode before starting a level. The list of levels as well as information about the selected level are displayed dynamically at runtime based on the information specified in the Level Data Array by the designer as well as the changes that have been made to it throughout later instances of the game. The dynamic nature of the menu system enable the developers to add new levels & the associated information into the Level Data Array without worrying about handmade changes to the HUD. Moving on to the specifics, the unlocked levels are listed using a scrollbox that uses custom widgets as it's children, while the level information showcases how to use vertical boxes to display UI elements. Apart from the Level Selection Menu, I've added a very minimalist Main Menu as well as some improvements to the End Game HUD. The End Game HUD is now neatly structured using a vertical box which dynamically alters itself based on the end result of the current level. For example, the Continue button is displayed only when the following conditions are satisfied: the player has completed the current level; & there are further levels to unlock after the current level. An additional option has also been added to return to the Main Menu from the End Game HUD. Here's a short preview video of the Level Selection Menu: